
When setting the camera the most important thing to remember is to set the exposure and focus manually. If either of these settings varies from frame to frame it can ruin the effect. The camera was set to make an exposure every 30 seconds over a four hour period.
Also for this test I shot the stills at the camera's lowest resolution - JPEG Basic 2464 x 1632. Why so low? Because these stills are destined to be incorporated into a 720p composition. Even at that low image setting, the pictures will need to be scaled down to about 27% of their original size to approximate the 720p frame.
A handy feature on the D7000 is its built-in Interval Timer. Here's a video which demos that tool:
Post-Processing
I use After Effects to convert the sequence of time-lapse stills to video. You can use Premiere Pro although I found that version CS4 struggled to render the sequence. After Effects worked much more smoothly.
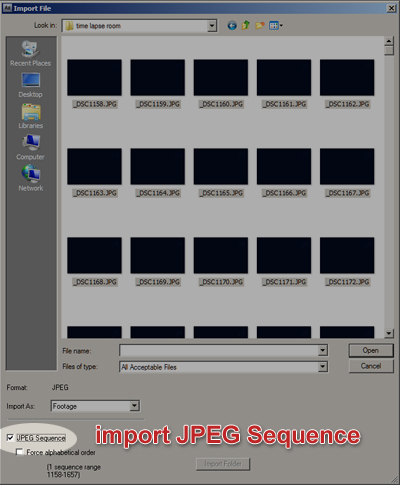
In After Effects, import the stills making sure to check "Jpeg Sequence". The sequence of stills will be treated as a single clip in the After Effects timeline.
After placing the clip in a 720p composition here are the results with no adjustments applied:
That looks OK and comparable to many time lapse videos I've seen. But it runs rather fast and the animation seems like it could be smoother.
I decided to double the time of the clip by applying Time Stretch to the clip - Layer>Time>Time Stretch - 200%. Since Time Stretch is set to 200%, the program is simply doubling each frame. Yuk.
To smooth the animation I applied Frame Blending - a powerful tool to correct that problem. Here are the results:
Not bad but notice the image distortion that occurs in the landscape as the clouds pass overhead. The following still frames are zoomed in to show the problem.

Distorted

Correct
Well that's no good.After some additional research and testing I learned that After Effects offers two kinds of Frame Blending - Frame Mix & Pixel Motion. Adobe claims Pixel Motion to be the superior tool and I've found that the program defaults to that setting when Frame Blending is applied. But for this clip, Frame Mix provides better results. To change that setting - Layer > Frame Blending > Frame Mix
Pretty smooth.
Finally here's an example by landscape photographer, Terje Sorgjerd which aptly demonstrates some of the possibilities of time lapse.
Note too that some of the shots include camera movement. One popular rig to achieve this effect is the Stage Zero Dolly from Dynamic Perception Here's a demo that shows how the system works:
3 comments:
Thank you for posting. The info about the frame blending was very interesting and am about to try it now. Cheers again
thank you for the post. it was really helpful.
I'm gonna try it in after effect, thank you..
Post a Comment